Looking for some best overgrown Minecraft house ideas? You’ve come to the right place! In this article, we’ve gathered the best house ideas across big places such as Youtube, Reddit, and even Pinterest to satisfy your craving! And don’t forget the super detailed build tutorial below that we prepared for you!

There is nothing better than living in a natural and spontaneous place surrounded by the nature. And by the mean nature in Minecraft, we mean leaves, flowers, special blocks, and even some cute passive mobs. Without further it does, let’s dig straight into it!
Table of Contents
List of The Best Natural Overgrown Minecraft House
#22 Dirt Hut
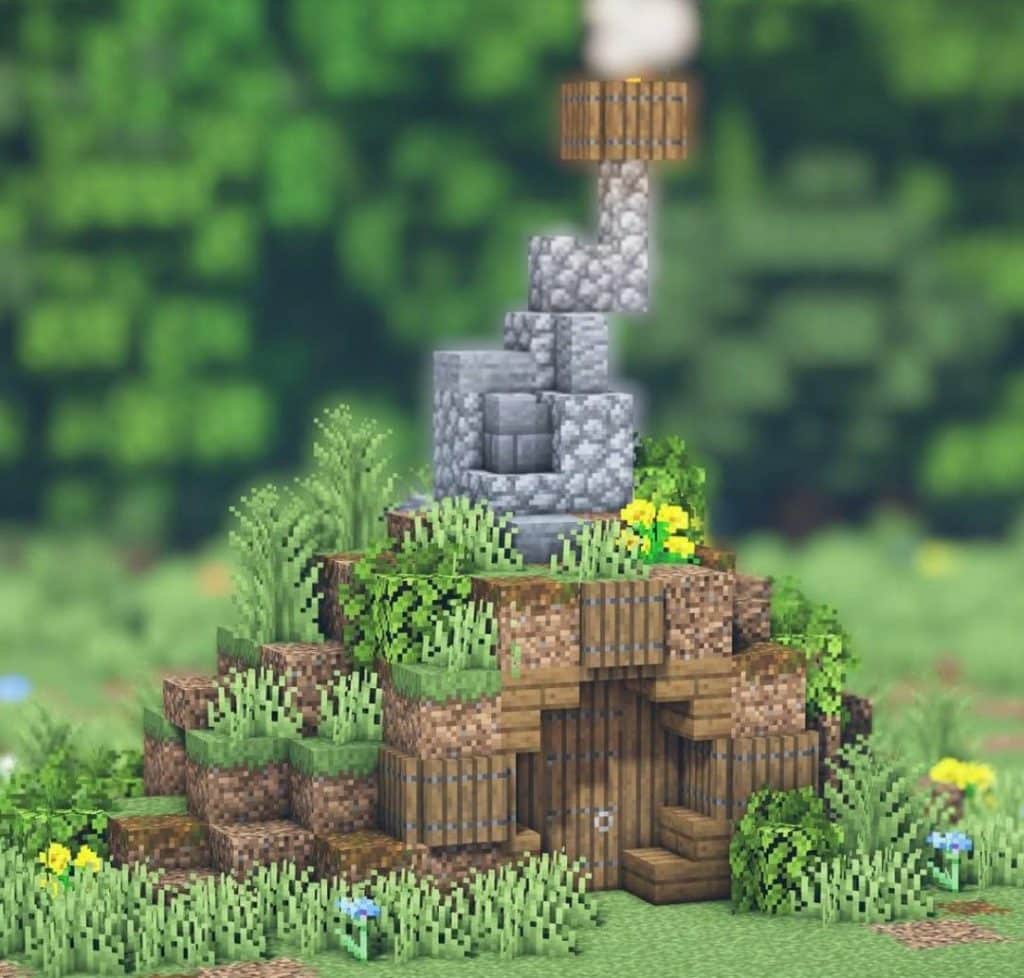
Well, the most basic starter house in the Minecraft world that every Minecraft players know! But wait! It’s not what you think, how about a detailed overgrown dirt hut with some greenery around it? And even with a stone chimney! If you pay attention closely, you can notice many cool parts like the mixing texture between the dirt, podzol, and coarse dirt.
All of the resources are easy to get, but the result is just fantastic. If you don’t know what to build in the early game, try this overgrown dirt hut out!
Source: Pinterest
#21 Small Overgrown A Framed House
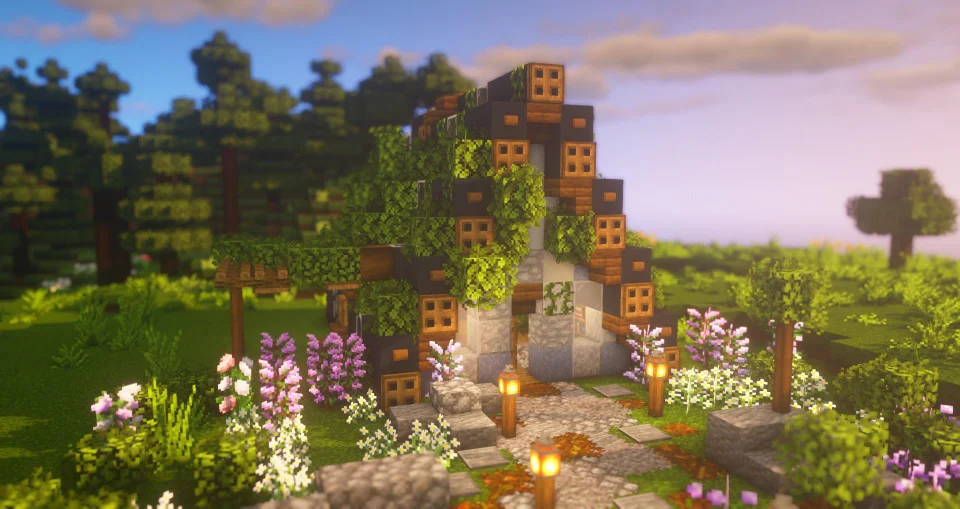
Just a lovely A-framed tent (or house) sitting in the middle of the forest, who will not want to live here? With your current A-framed house, try to mix the texture with some blocks in that category.
For example, pathways can be made using dirt, podzol, coarse dirt, or gravel. The wall can be made of stone, coral, concrete powder, cobblestone, and more! Then the only material that makes this build look overgrown is the leaves and vines hanging around with some lovely flowers in the scene.
Source: Reddit
#20 Overgrown Cliffside Mud and Mangrove Houses
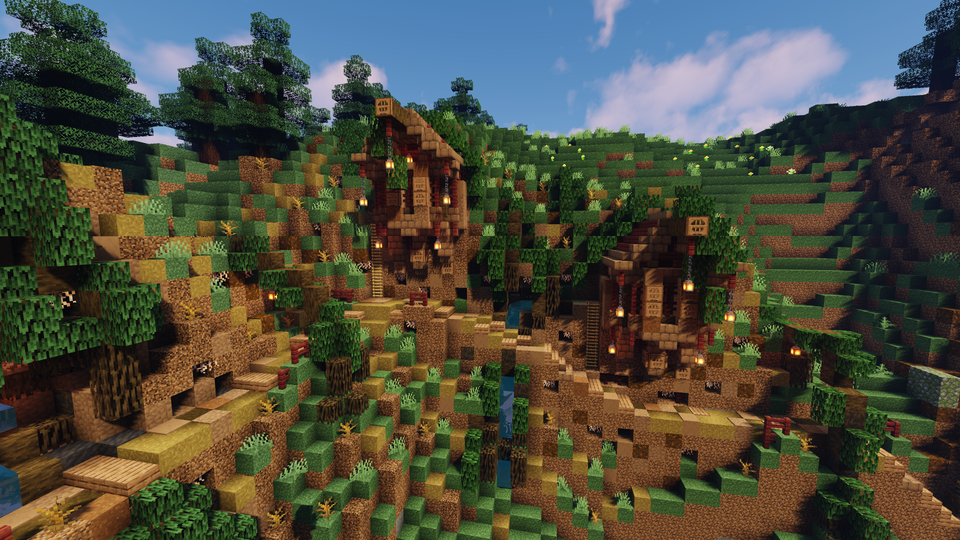
Not so fancy even with shaders on, but these overgrown cliffside houses bring a peaceful vibe, just imagine waking up in the morning on those houses! Look at the detail of the pathway as well as the houses themself. You may need to install custom texture packs for this one for that bulky dirt of the houses.
Source: Reddit
#19 Overgrown Gothic Style House
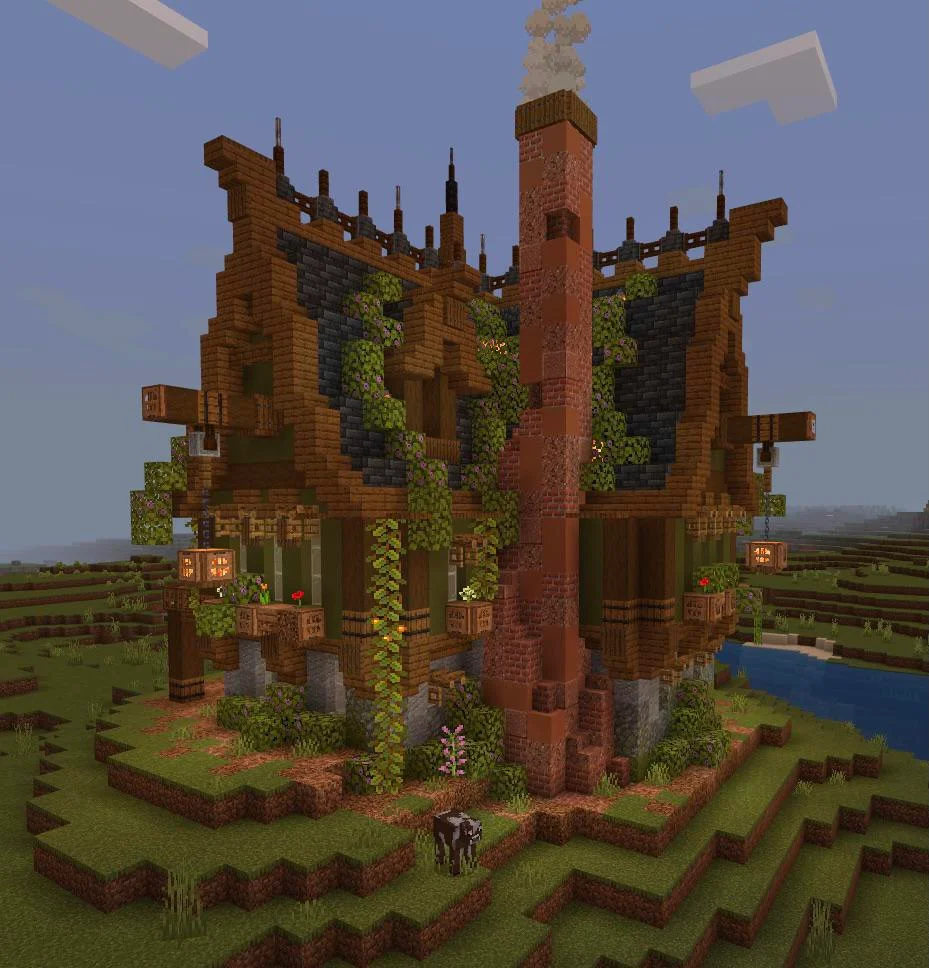
Time to upgrade your medium house to something worth talking about! This is an advanced L shape house in Minecraft with so many details in the texture part. And the overgrown effect is created by the glow berries, leaves, azalea leaves, flowers, and more!
Source: Reddit
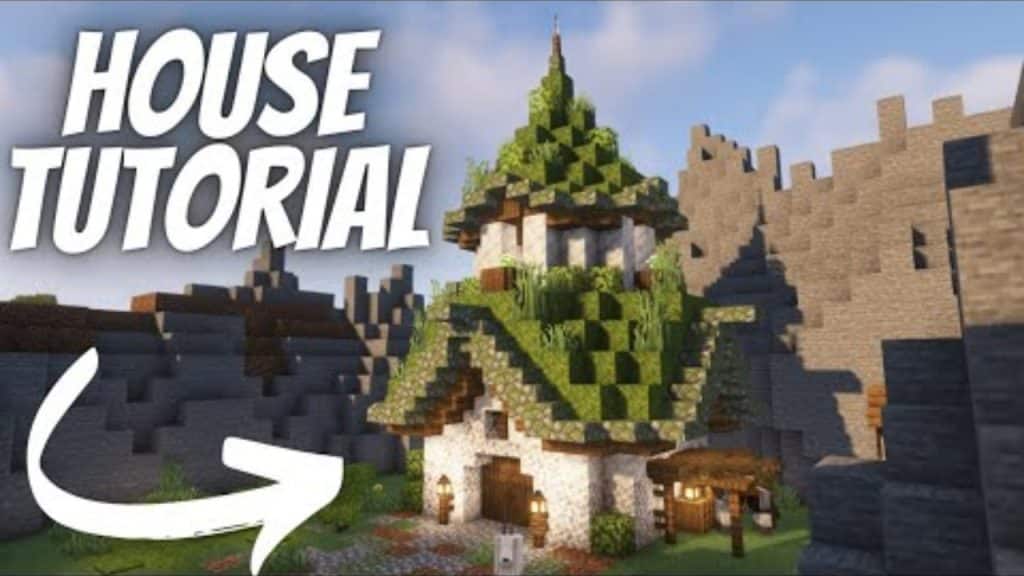
#18 Mage’s Overgrown Cottage
You’re an old mage who’s retired and lived in the forest, what type of building do you want to live in? Exactly! This Mage’s Overgrown Cottage will amaze you with its simple design yet, effective to create a magical mood. The house is built right next to a custom giant tree, combined with the vines all over the place, which is how the overgrown effect is created.
#17 Fantasy Overgrown House
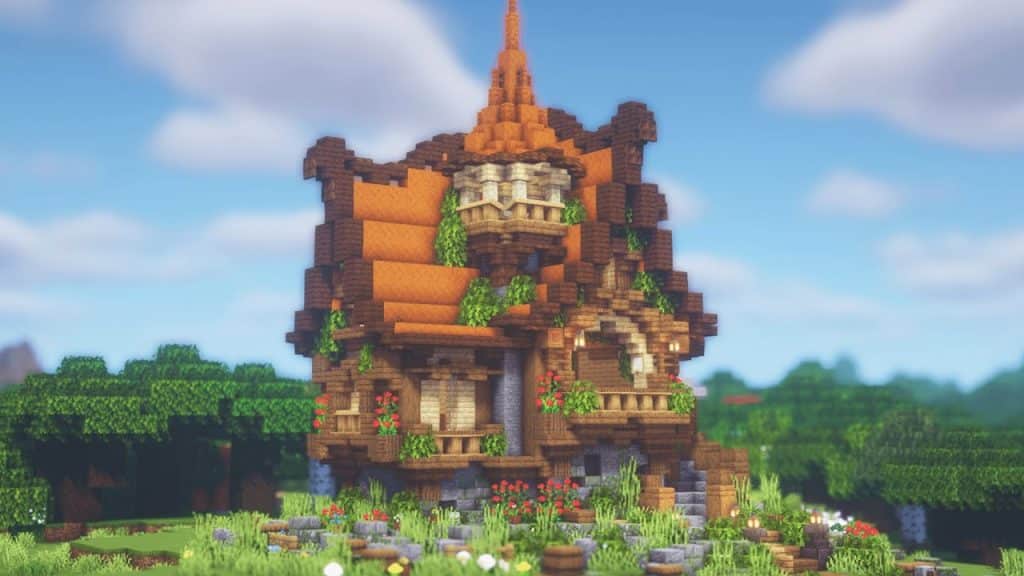
There is something cool and attractive in this build since the builder uses a gradient block pallet. You can see he starts with the most basic block at the bottom, and start making the actual house with the spruce and dark oak wood in the middle. And on top is the bright orange color from the red sand, this makes the roof stand out to catch your attention.
#16 Cozy Survival Cottage With Greenhouse

Nothing too fancy or not any crazy amount of block count, this small cottage uses the effect from the shaders then combine with the light come from those lanterns, to create the coziness of the build. There are plenty of things to talk about this build like the multi-floor layout or the farm in the background. And most importantly, the leaves and overgrown vines as always!
#15 Overgrown Industrial Fantasy House

Welcome to another L shape house but on a smaller scale. However, small doesn’t mean it’s not fully detailed. Just look at the wall containing calcite and diorite, the roof trim uses dark material while the inner of the roof use weathered cut copper blocks. With some leaves and flowers, this build become our favorite so far!
#14 Overgrown Spruce Mansion
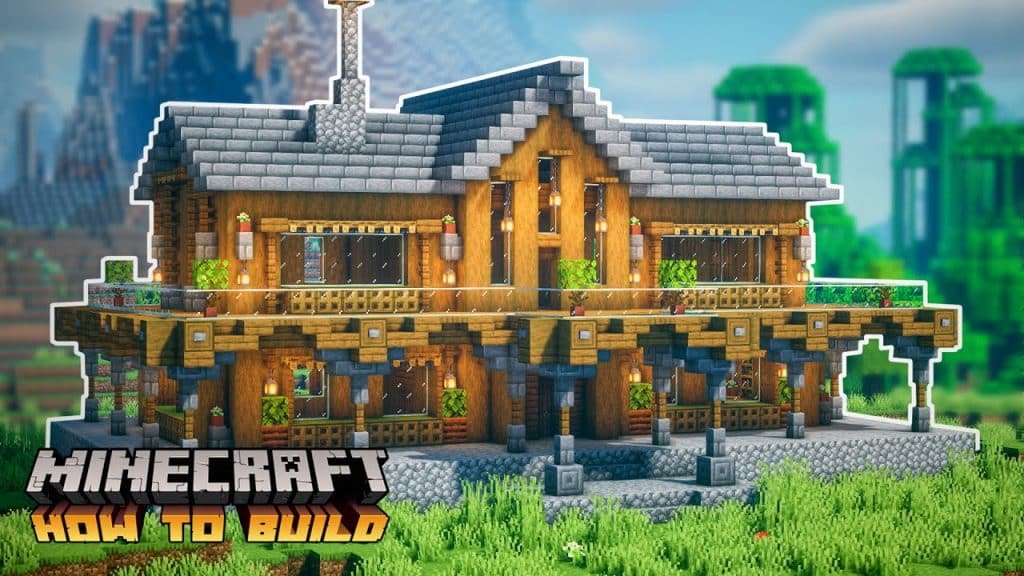
If you’re looking for a double overgrown Minecraft house so you can live with your friends, let’s try this build idea out! On the outside, it looks like a train station. But the interior is quite comfortable and has everything you will need for survival. The build is also symmetrical so you don’t need to argue with your friends about which part to live in!
#13 Easy Overgrown Cottage
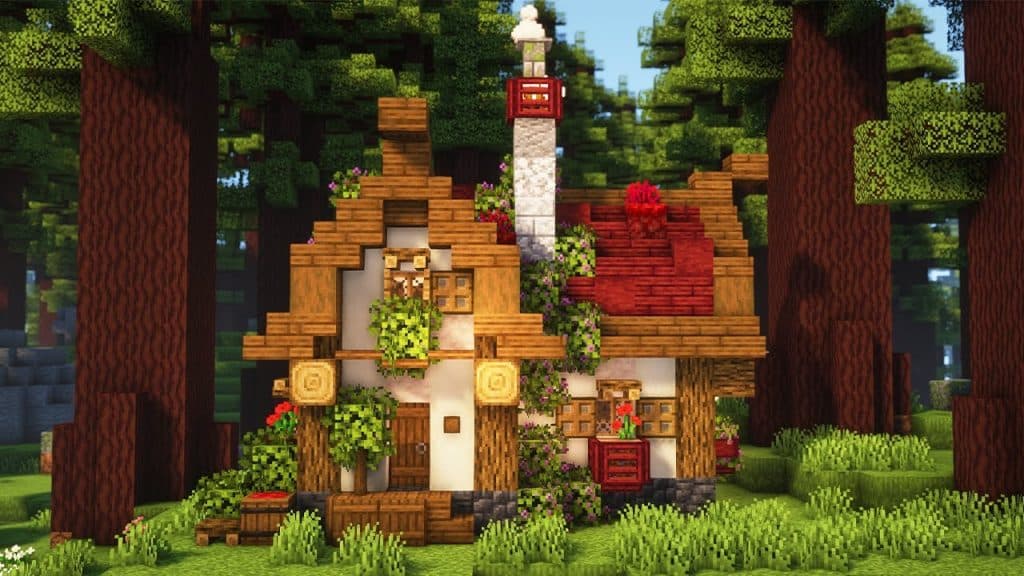
A lovely fairy house in a cute forest! By using a combination of different wood types such as oak and spruce and other wood variants like slabs and stairs, this wooden build looks amazing even though it’s small.
#12 Overgrown Lush Starter House
Using two domes shape and stack them up together, then fill the roof with moss and mossy cobblestone blocks, this build is truly amazing by how natural it looks! To bring the natural vibe furthermore, diorite and calcite with bright white color, combine with the dark spruce wood and all things together create a gorgeous overgrown house!
#11 Overgrown Treehouse
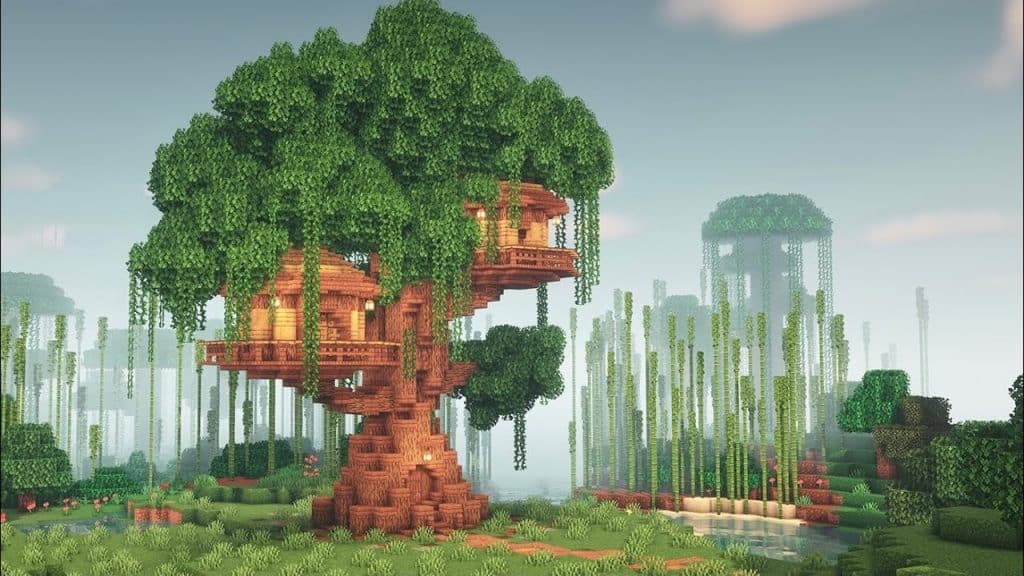
When it comes to overgrown houses in Minecraft, it’s a big mistake when we do not mention treehouses, right? This building features a large old tree containing two small houses inside it. The number of leaves and vines alone makes this build look insanely epic! And building houses this high can prevent hostile mobs from entering your house effectively!
#10 Overgrown Cozy Mountain House
Carved inside a mountain, this overgrown cozy mountain house brings the comfortable for most travelers, especially if you build this near any snowy mountains. Just don’t forget to add some bushes, flowers, and leaves to the house.
#9 Overgrown Stone Ruins
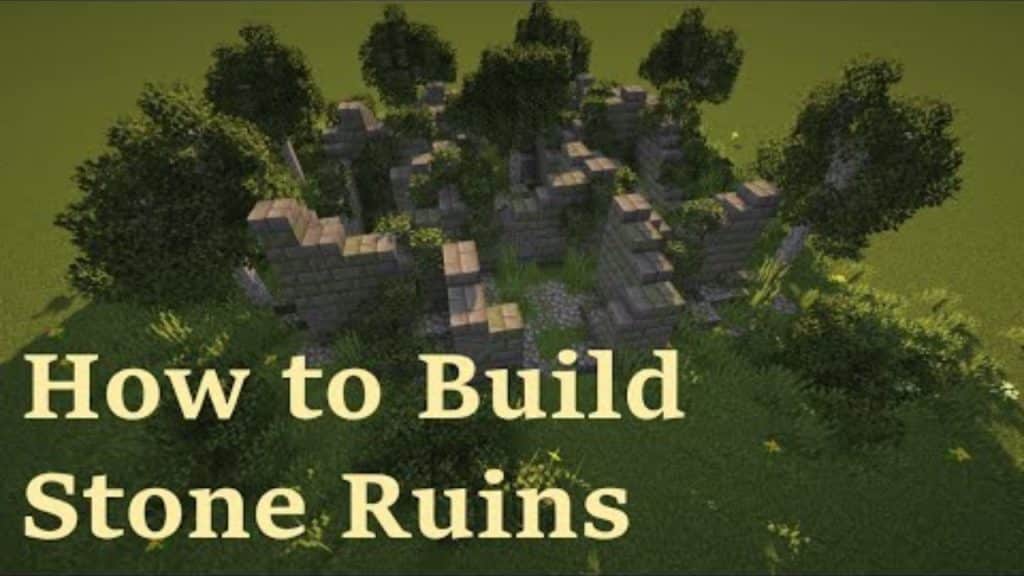
If you want to build old overgrown ruins or a mossy maze, check this tutorial out! With simple block choices like cobblestone, stone brick, leaves, and some bone meal to grow the grass, you can rebuild the entire structure just in half an hour!
#8 Garden Fae Cottage
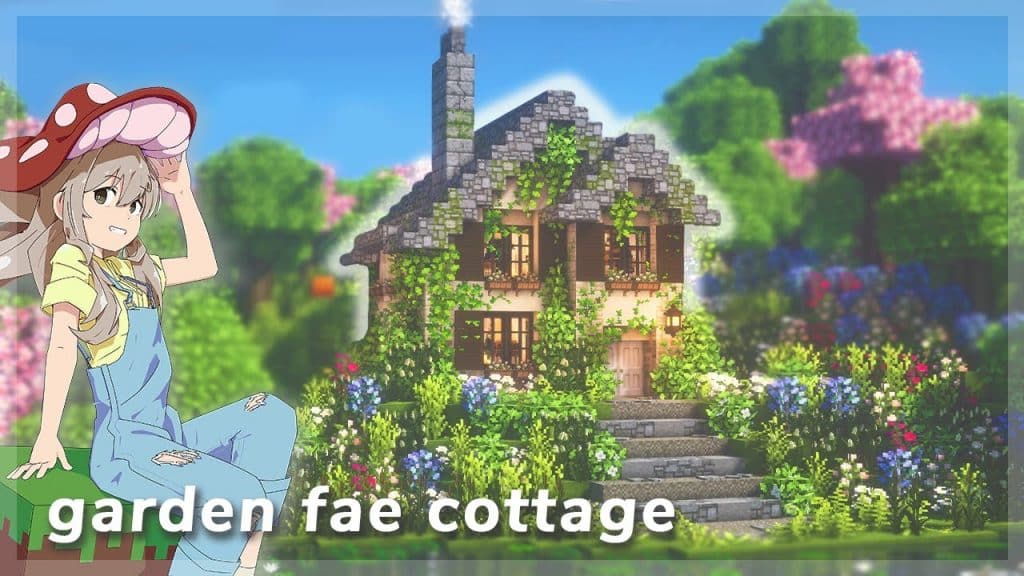
This particular house reminds you of Ghibli’s world! With colorful blocks but yet, still remain a little nostalgic feeling about the whole tone. A small house in the middle of the flower field with a mossy stony roof, nothing to complain about if we can live a life like this!
#7 Simple Overgrown Starter House
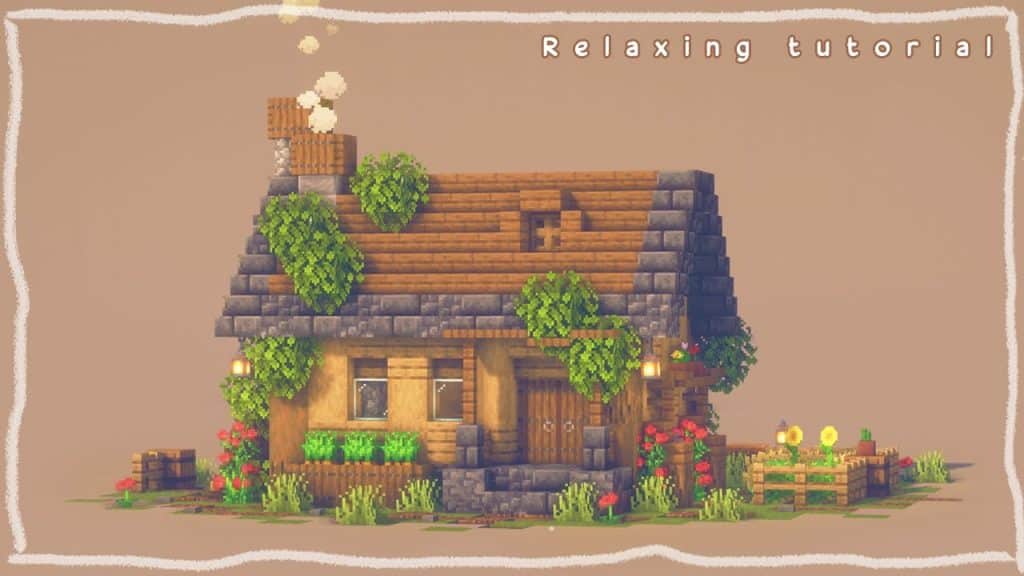
Adorable, lovely, and sweet are the words for this tiny house! Everything looks balanced and fits so well with each other like the dark deepslate trim and the spruce roof on the roof. Or the stripped oak log of the main wall. And with an acceptable usage of the leaves and greenery blocks around the house. This is by far the most efficient overgrown Minecraft house!
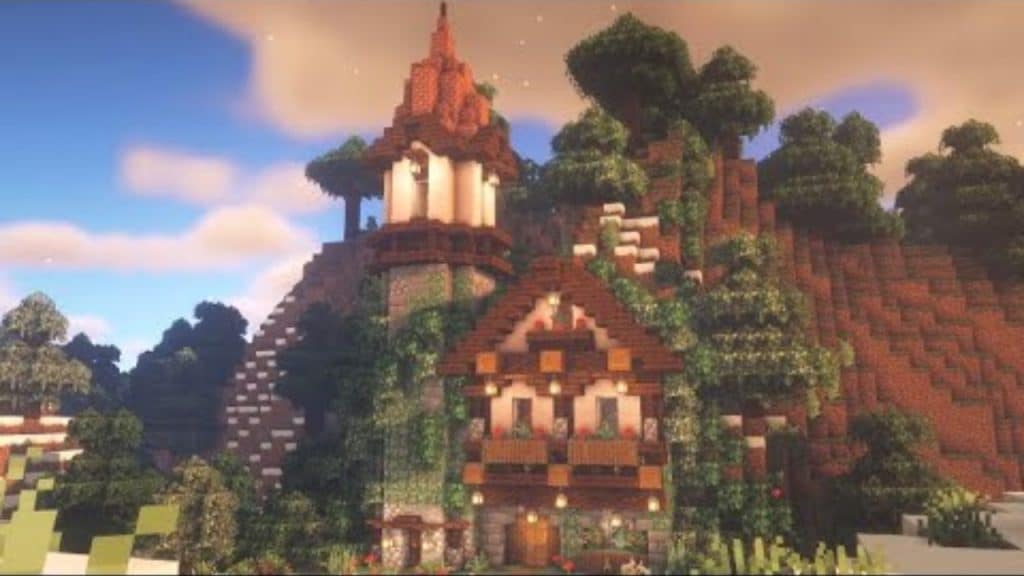
#6 Overgrown Minecraft Lighthouse
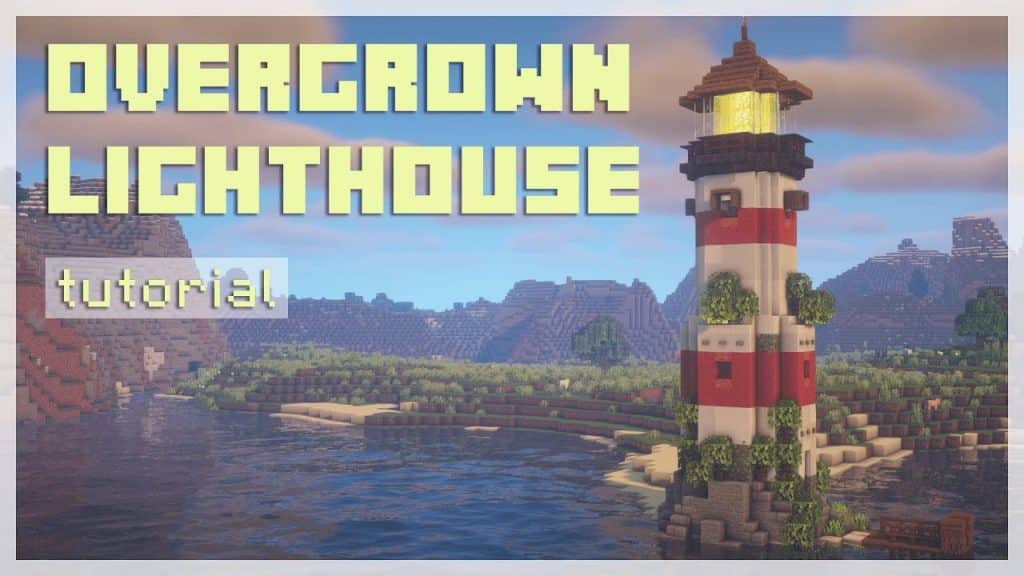
Unique and beautiful is what this overgrown lighthouse brings. When it comes to the lighthouse, you may see other styles than overgrown such as modern, futuristic, or even cartoon styles. But when combining them with some hanging leaves and mossy stone at the bottom, the lighthouse just becomes more alive!
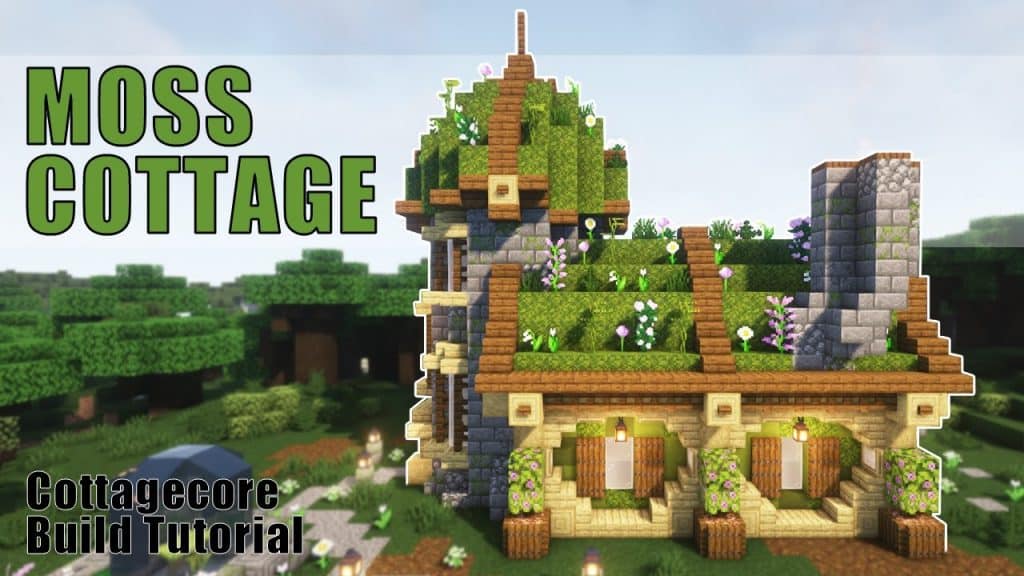
#5 Overgrown Moss House
If you’re a fan of gambrel roof houses or just any houses with a big and heavy roof, try this build out! Taking advantage of the new moss block and azalea leaves in the new update, you can feel the harmony of nature in this build! Also, let’s pay attention to the detail on the pumpkin, and see how the builder uses pickles for the pumpkin’s stalk.
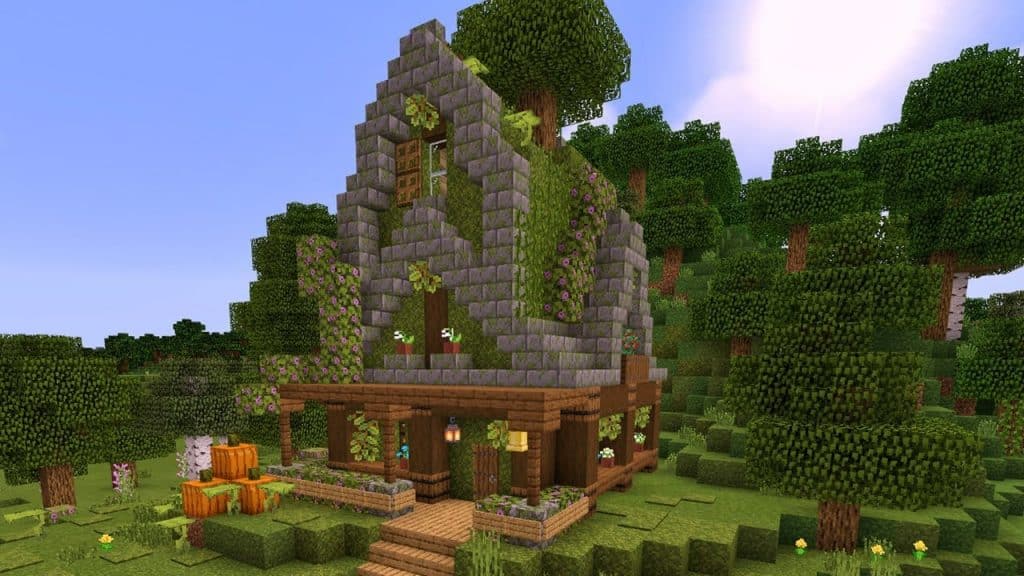
#4 Aesthetic Secret Overgrown Cave Base
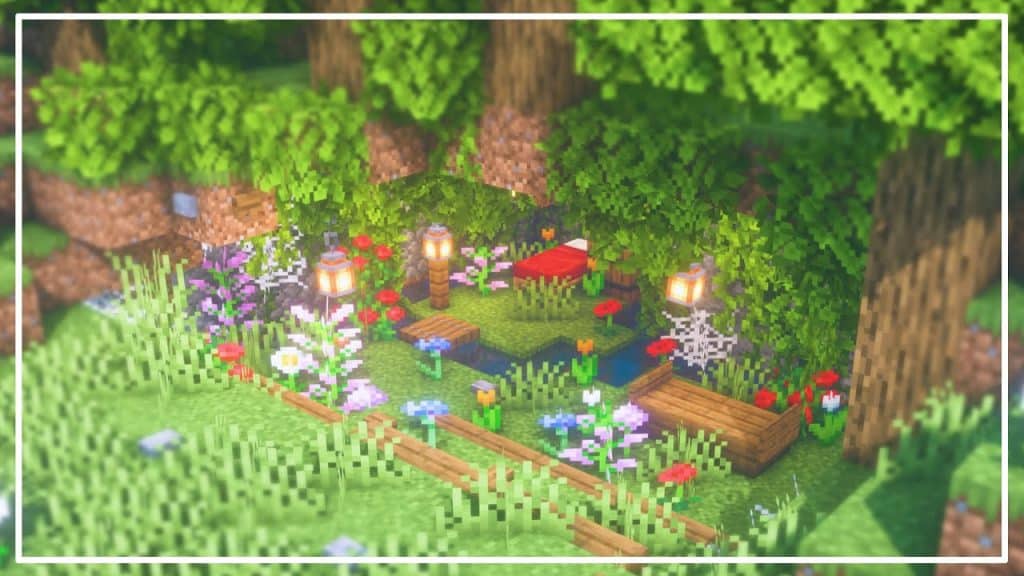
Now let’s bring the overgrown base to a whole new level by hiding your actual base underground, and building an aesthetic playground to lure away those thieves’ eyes. This garden does not use any special blocks and is super simple to build. If you want it to look better, try installing some Minecraft shaders!
#3 Mossy Cottage
This building style reminds us of GeminiTay’s style, where the main blocks are birch and spruce wood, go along with sandstone and especially, the moss block. Then put some flowers on top of the roof and you’re good to go!
#2 Overgrown Medieval House
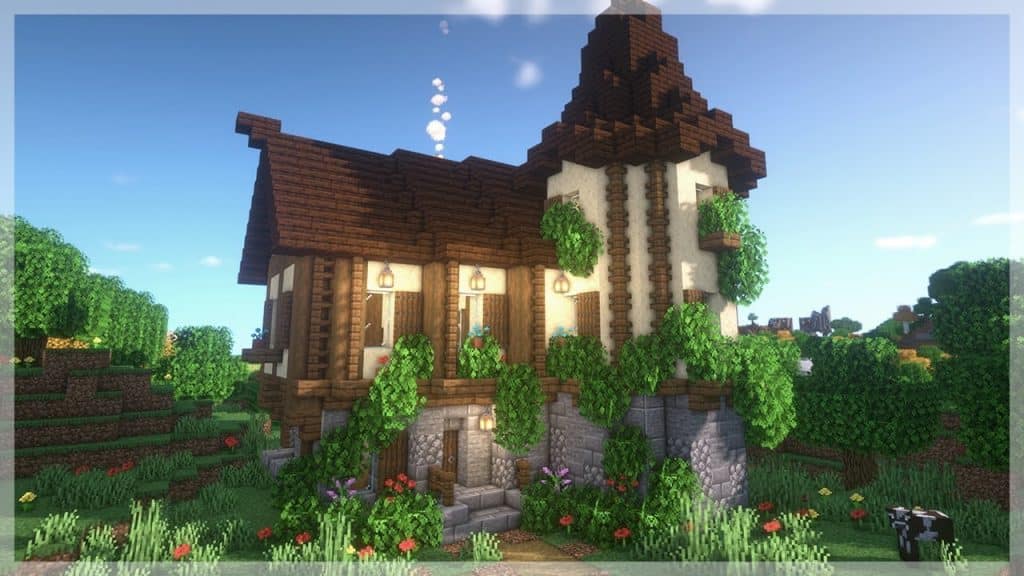
By merging medieval style with an overgrown theme, this house goes beyond the word gorgeous! The base is made of stone to create reliable support, and the actual house is made of sandstone and dark wood, making all parts of the building stand out on their own. Finally, add leaves and flowers to make it look even more natural!
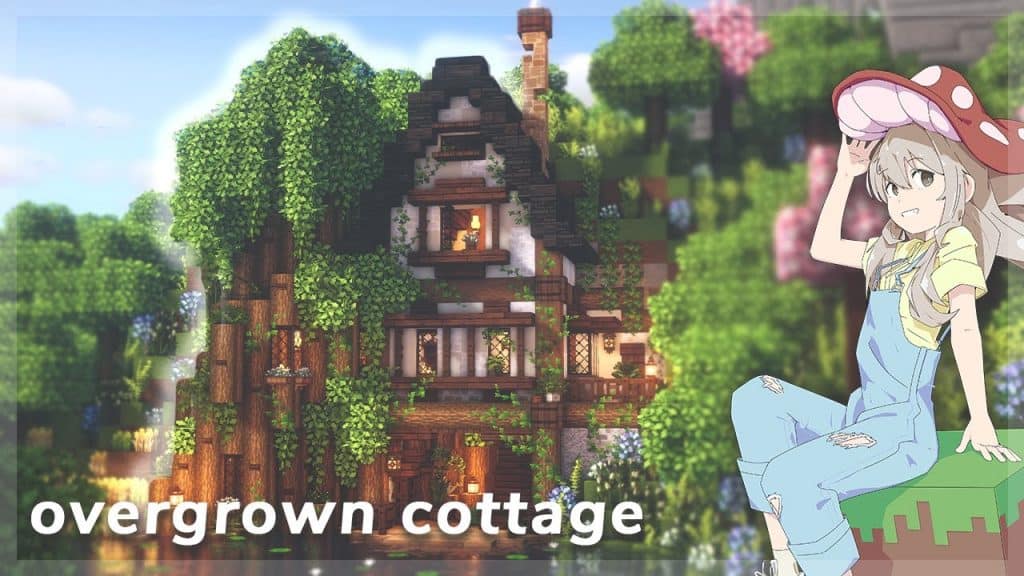
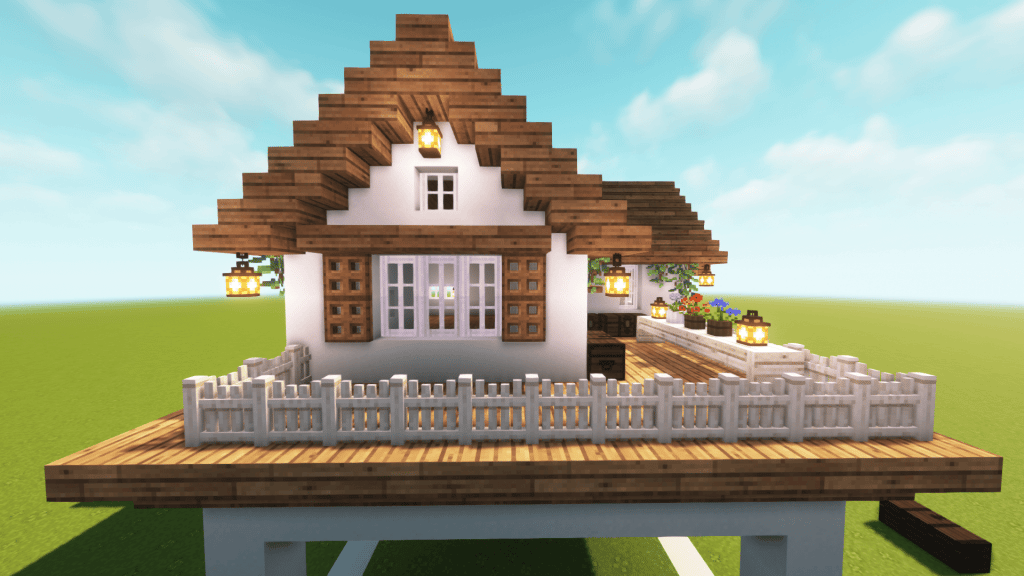
#1 Overgrown Aesthetic Cottagecore
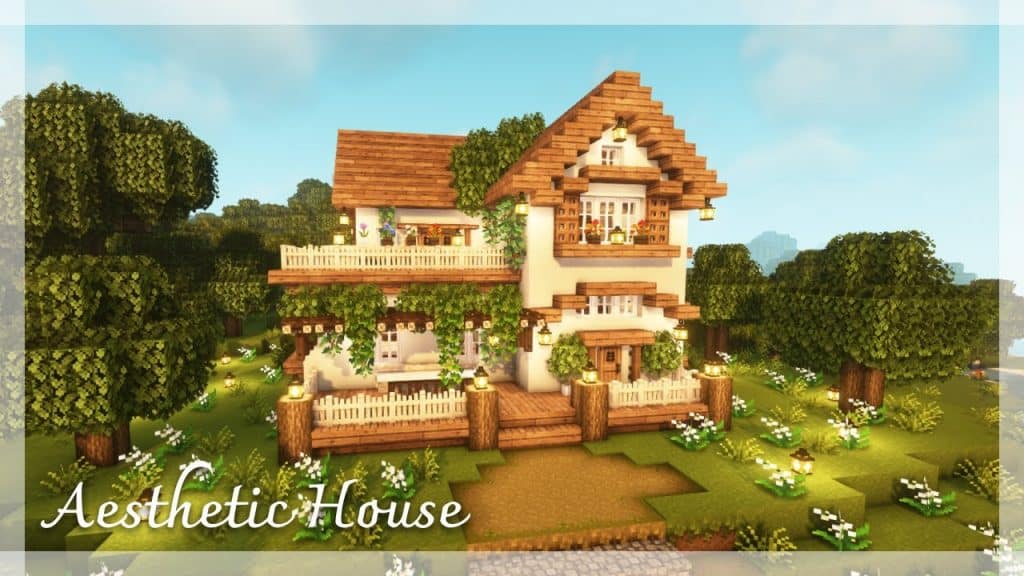
The first position on the list belongs to the countryside house with two floors, lovely balconies with hanging leaves, and a bright color palette that makes the building even better. To achieve the maximum effect of the overgrown effect, using Mizuno’s 16 Craft Resource Pack is required.
How to Build An Overgrown Minecraft House
Without wasting your time, we’ve prepared the material list and a detailed picture guide below so you can follow it easily. We only guide you to build the exterior of the overgrown Minecraft house. For the interior, we believe in your creativity!
Remember to install Mizuno’s 16 Craft Texture Pack if your block’s textures do not match with the build.

The number of items may be different from the picture above. It’s only used for the item appearance reference. You will need:
- 8 Oak Log
- 234 Oak Planks
- 257 Oak Stairs
- 100 Oak Slab
- 35 Oak Trapdoor
- 8 Oak Fence
- 3 Oak Doors
- 4 Birch Stairs
- 6 Birch Slab
- 2 Birch Trapdoor
- 38 Birch Fence
- 2 Birch Sign
- 12 Spruce Fence
- 497 White Concrete
- 61 Light Gray Stained Glass Pane
- 4 White Carpet
- 23 Campfire
- 5 Chest
- 16 Flower Pot
- 2 Dead Bush
- 30 Lantern
- A certain amount of Oak Leaves, Glow Berries, and Flowers
Step 1: Build the Wall and Roof
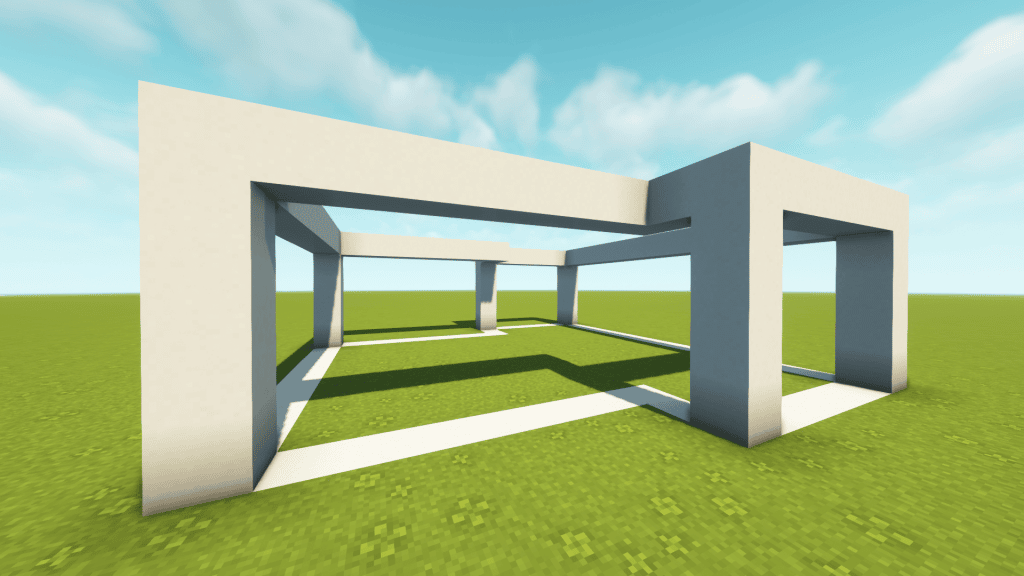
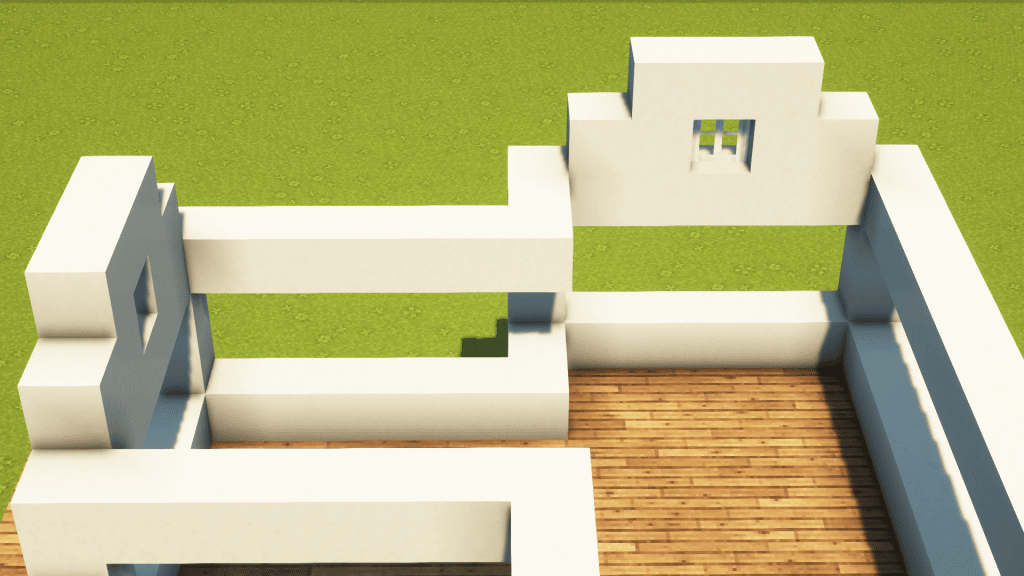
The layout is the first thing if you want to build anything in Minecraft. We use red and yellow concrete for easy counting purposes, but if possible, you should fill those with white concrete. The longest wall on the right is 15 blocks, continue by the 7 blocks on either side. Then go 3 blocks and continue with the line of 9 blocks. Then fill the remaining line with white concrete.

Build 5 blocks tall for 6 primary columns and connect them together using white concrete.
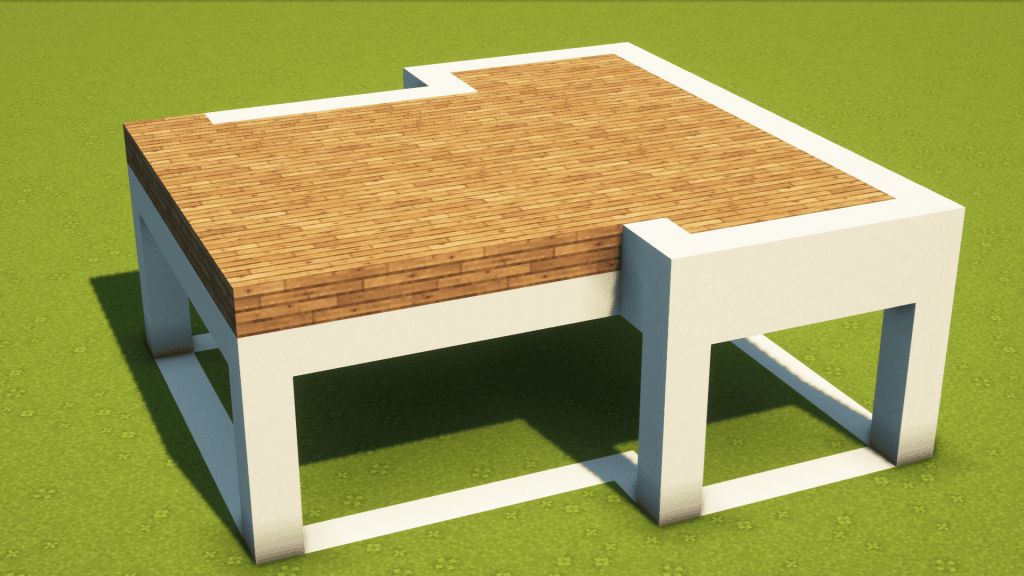
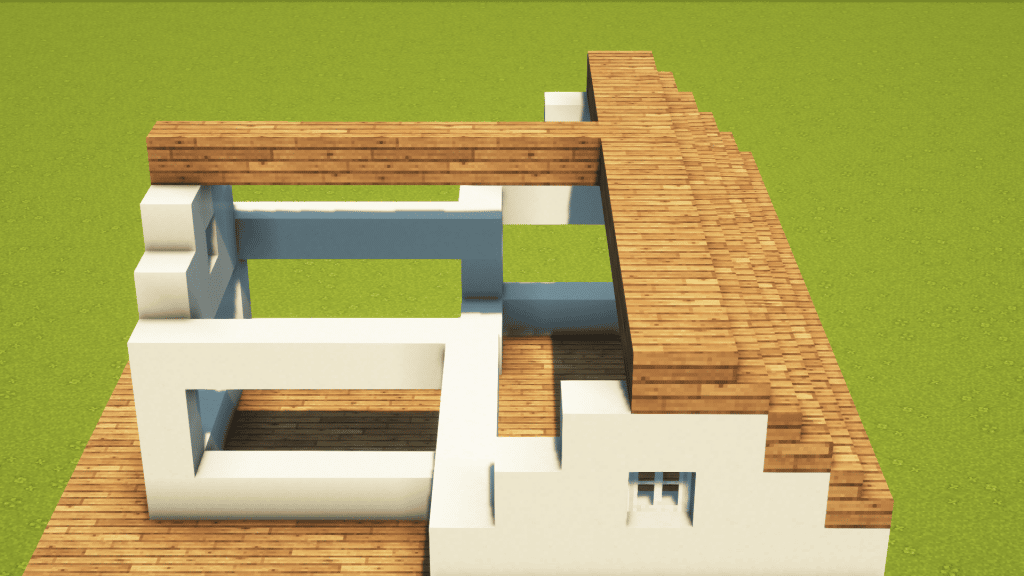
Next, fill the layer on top of the white concrete using oak planks. Remember that there is a white trim of white concrete on the right side.
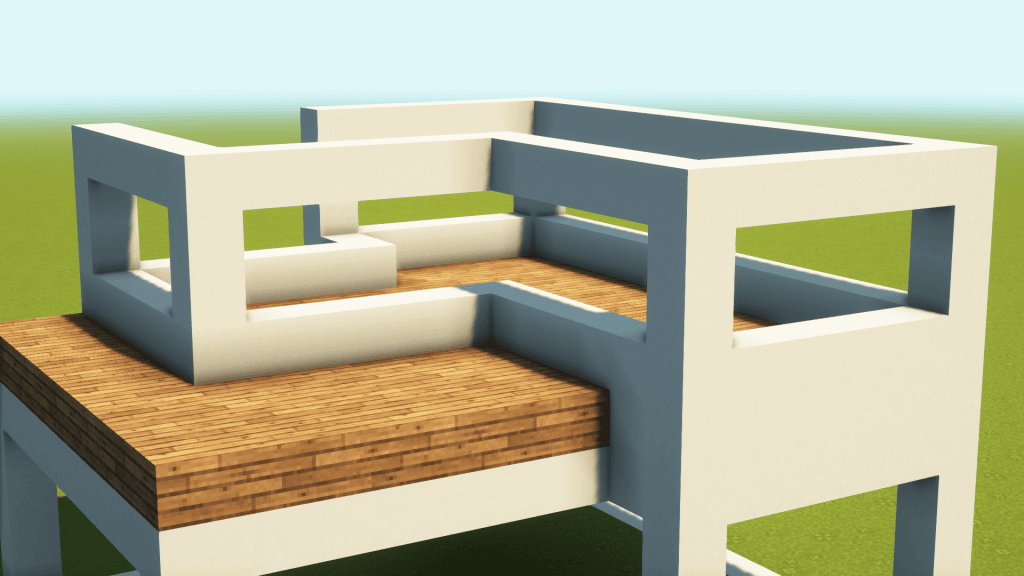
Then build up another 3 blocks for each primary column and connect them together again.
On all sides of the roof, start building the window with a pyramid shape like this.
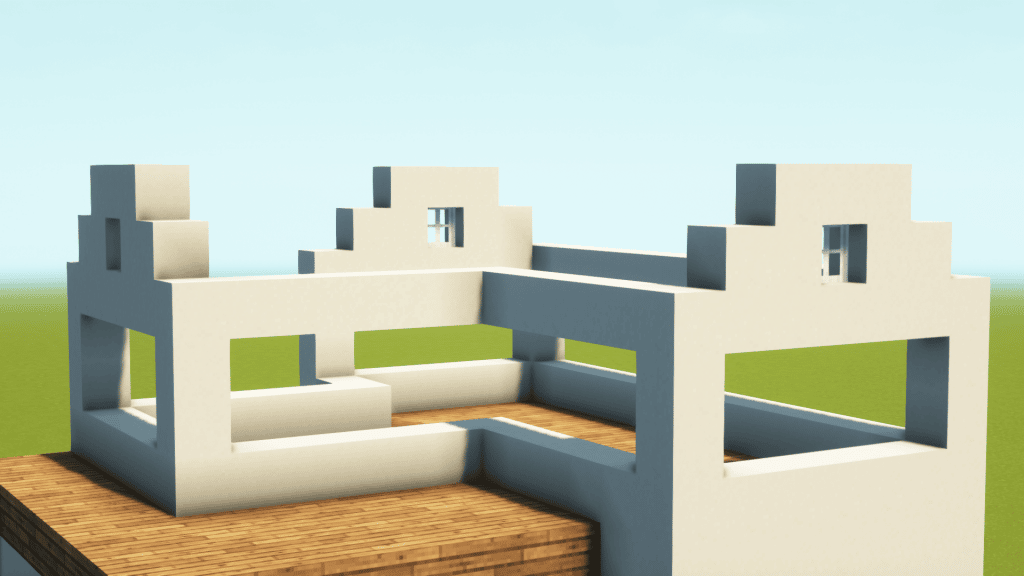
Connect the last line of the second-floor wall.
Use oak planks, and build a T shape line connecting all three parts like this. Then start filling the right side with spruce stairs.
Repeat for the other two sides. You will have something like this.

Finally, place oak slabs on top to finish off the top of the roof.
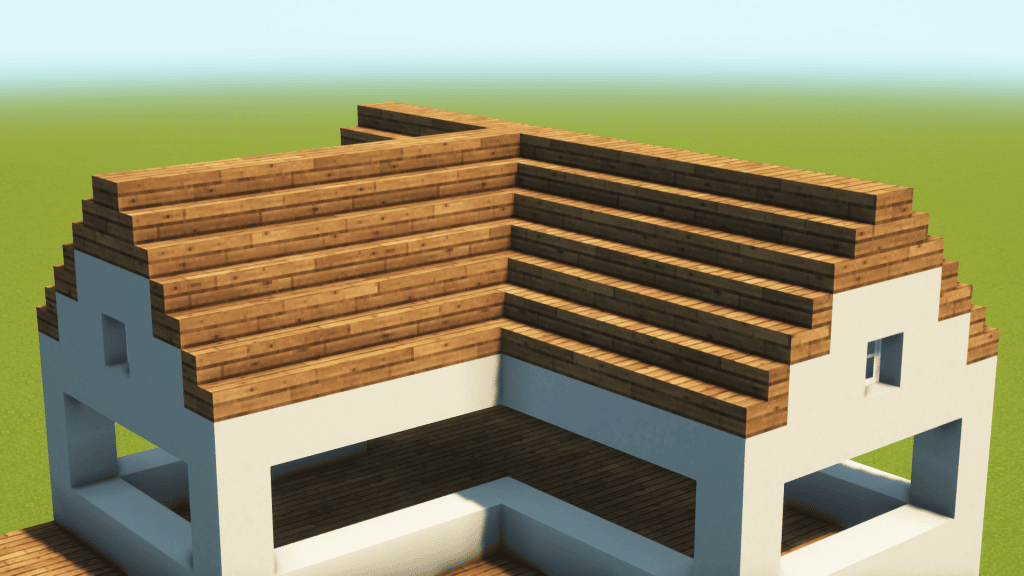
The roof looks a little bit odd. So let’s extend one more layer down and out to create a hanging effect.
Continue the hanging roof and connect them all together on all parts of the roof. Here is the final result.
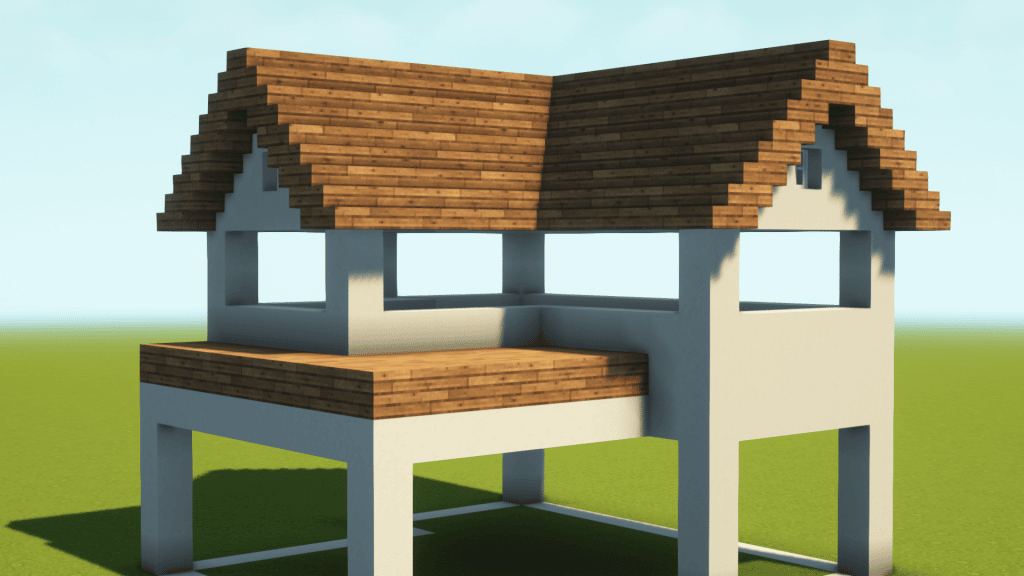
To complete the roof and make it feel overgrown, add some leaves on the roof like this.

Step 2: Detail the Wall
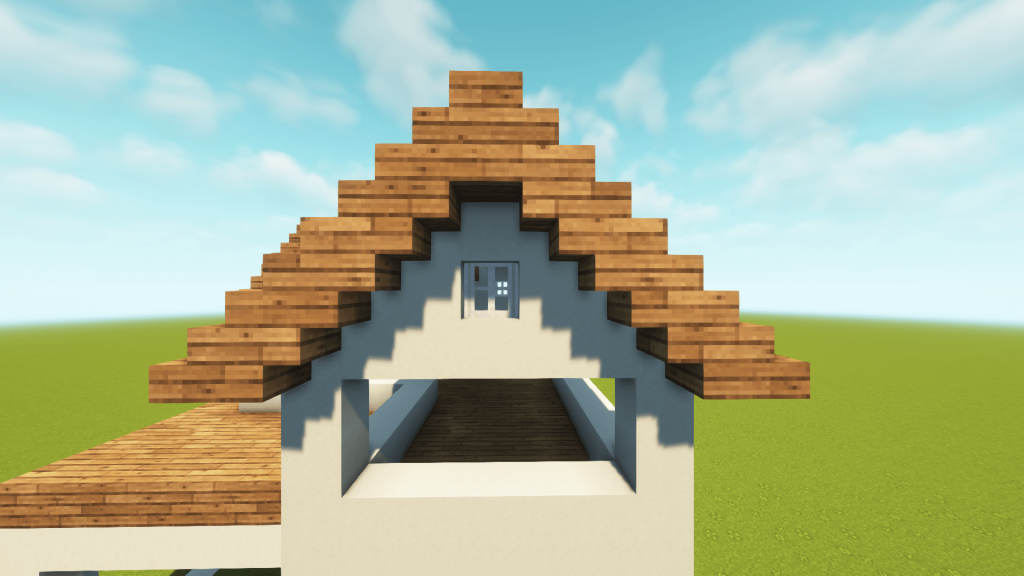
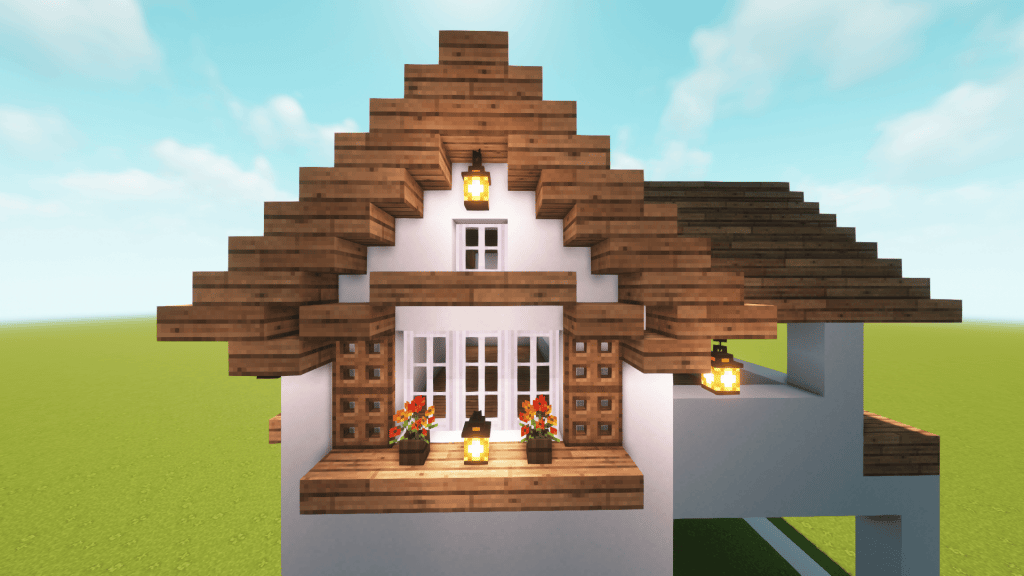
Let’s start decorating the wall. We begin with the front wall of the second floor first. Fill the wall with white concrete and put 6 light gray stained glass planes in the middle. Then use oak trapdoors and oak slabs to cover the window up. Finally, hang 3 lanterns on the ceiling, and 1 on the balcony with two flower pots.

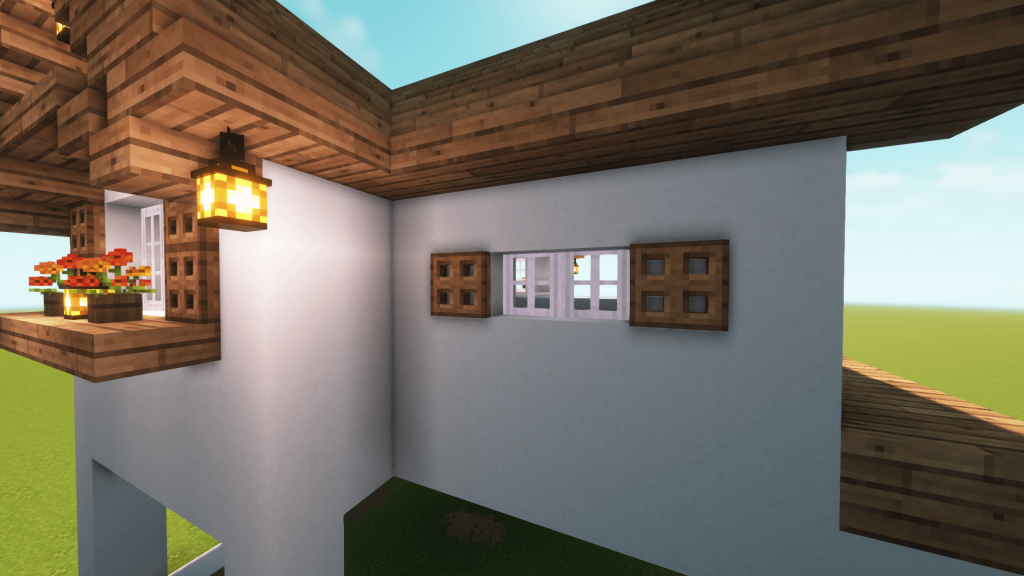
To the right side of the second-floor wall, fill the wall in with white concrete again and make two small windows like this. Each will contain 2 glass panes, 2 oak trapdoors, 4 oak slabs, and 1 lantern.
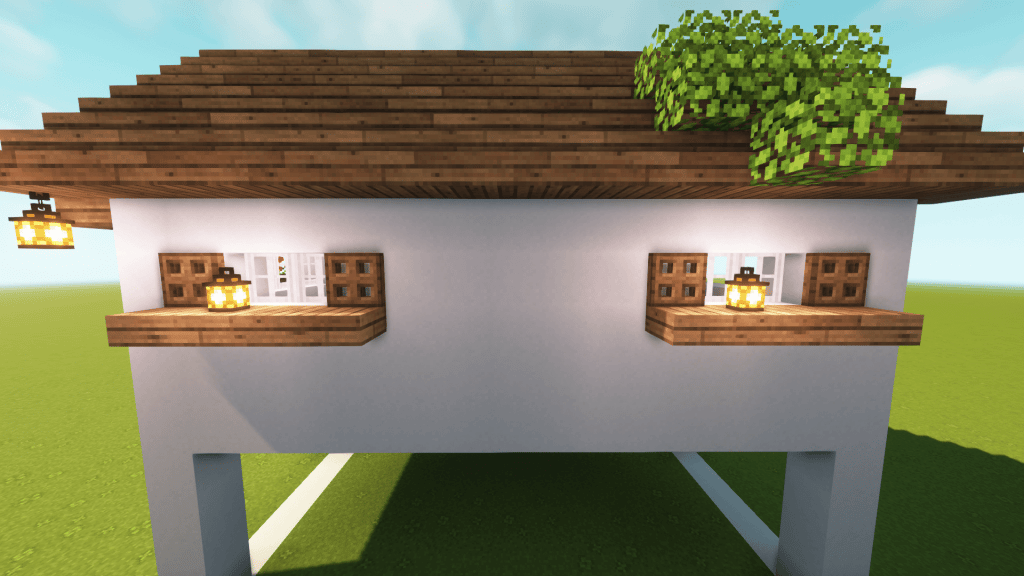
On the back side, just a replica of precisely what is built in the front.
To the right part of the back side, put a small window here with 2 glass panes and 2 oak trapdoors.
On the left side is slightly different compared to the front and the back. You will need 6 glass panes, 4 oak trapdoors, 5 oak slabs, and 3 lanterns. No bottom balcony and flower pots this time.

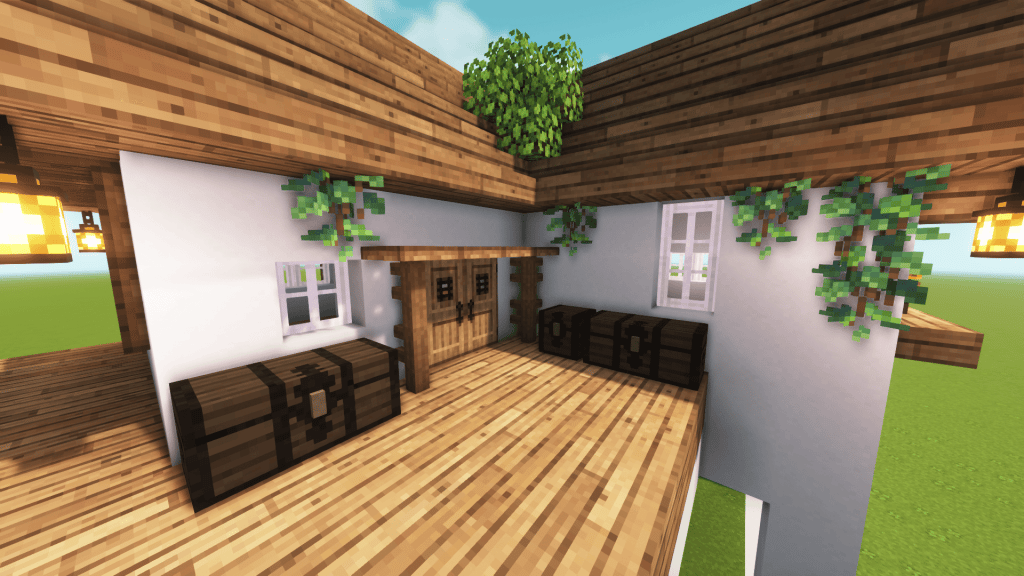
And for the left part of the front side, add two windows, and double doors with oak fences and trapdoors on top of it.
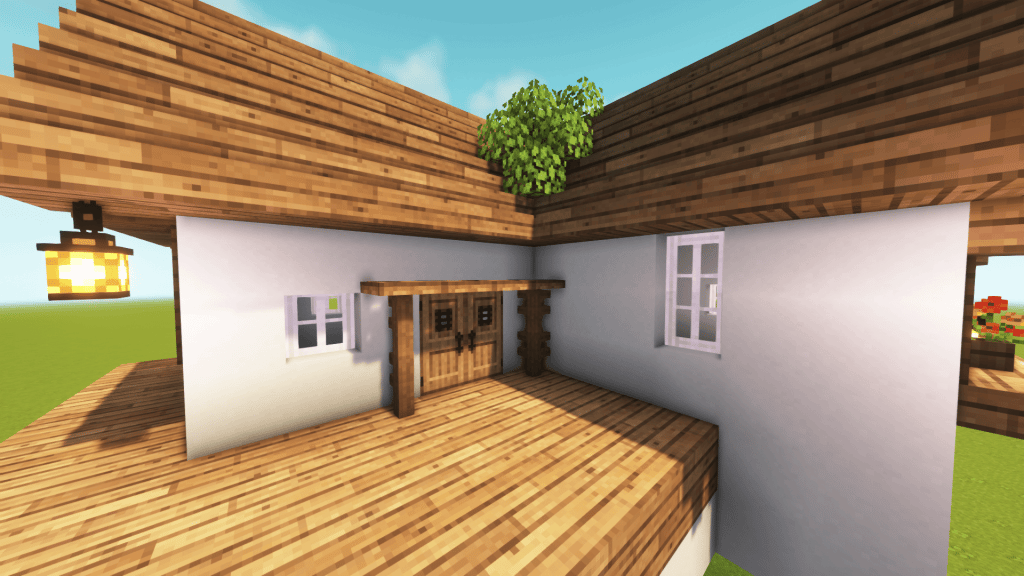
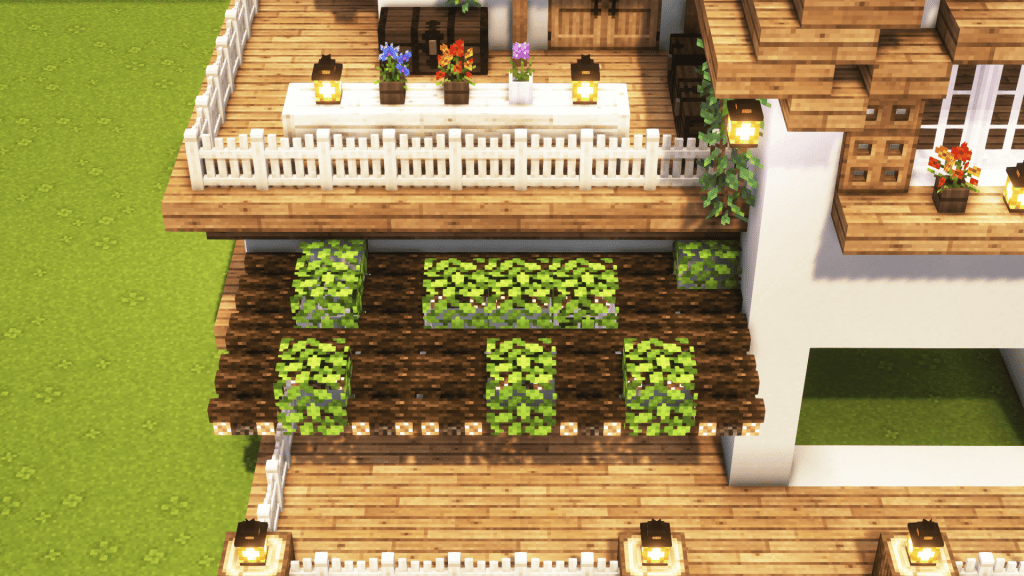
Now let’s add some glow berries and chests around this area.
And a lovely table with flowers and lighting on it. The table is made of birch slabs and trapdoors. Next, use oak stairs and place them upside down on the same layer as the oak planks. Wrap them all around to the back.

Place a bunch of birch fences on top of those oak stairs you placed previously. And there you have a lovely balcony on the second floor!
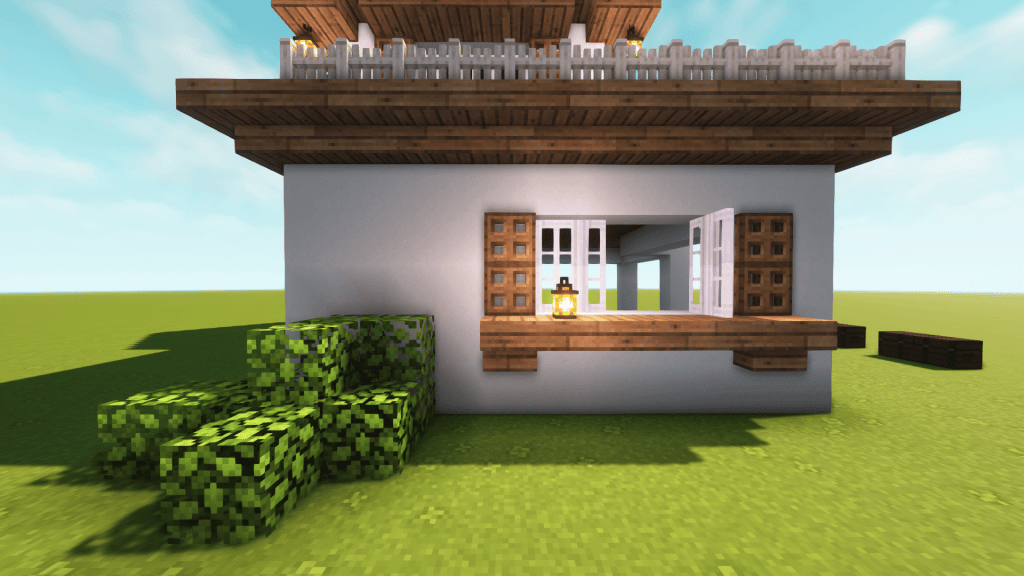
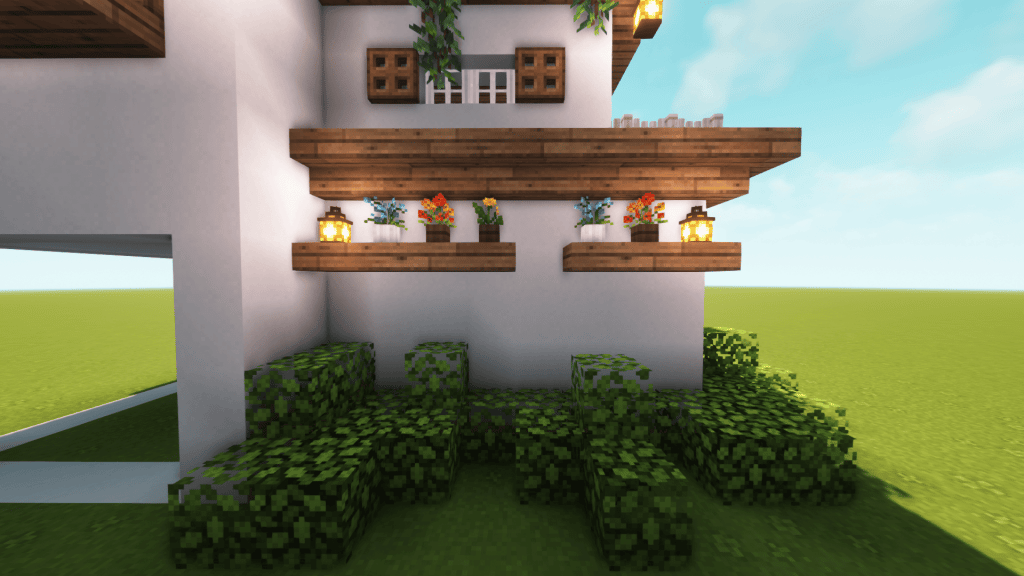
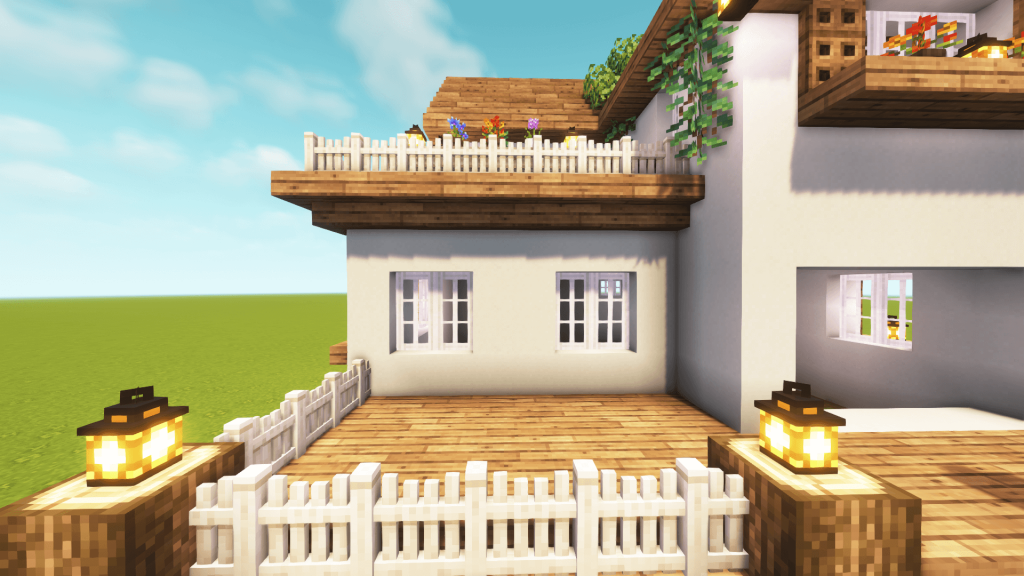
Going to the first floor, left side. Let’s fill the wall with white concrete and build a 4×2 window like this with one open and one closed. Then again use oak trapdoors, stairs, and slabs to cover it up. Remember to add some leaves on the left as well.
To the backside, add two oak slab lines and fill them with lanterns and flower pots. Then add more leaves to the ground.
To the left part of the back side, add a small 3×1 window and cover it up with 2 oak trapdoors and 5 oak slabs. Another leaves pile is needed here.
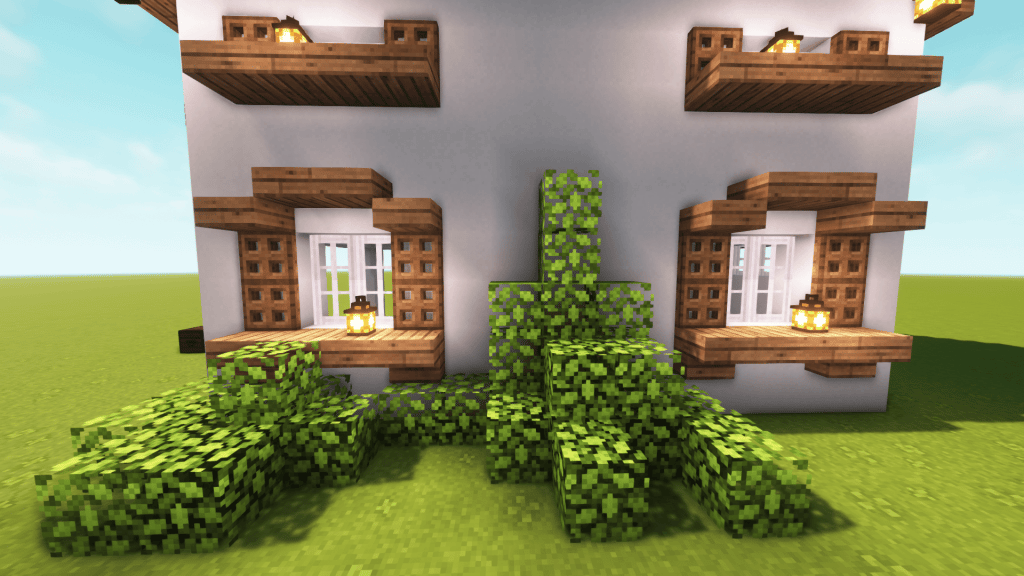
To the right side, add two big windows and they should symmetrical and identical to each other. Then add two more leaves piles here. You’re getting there!
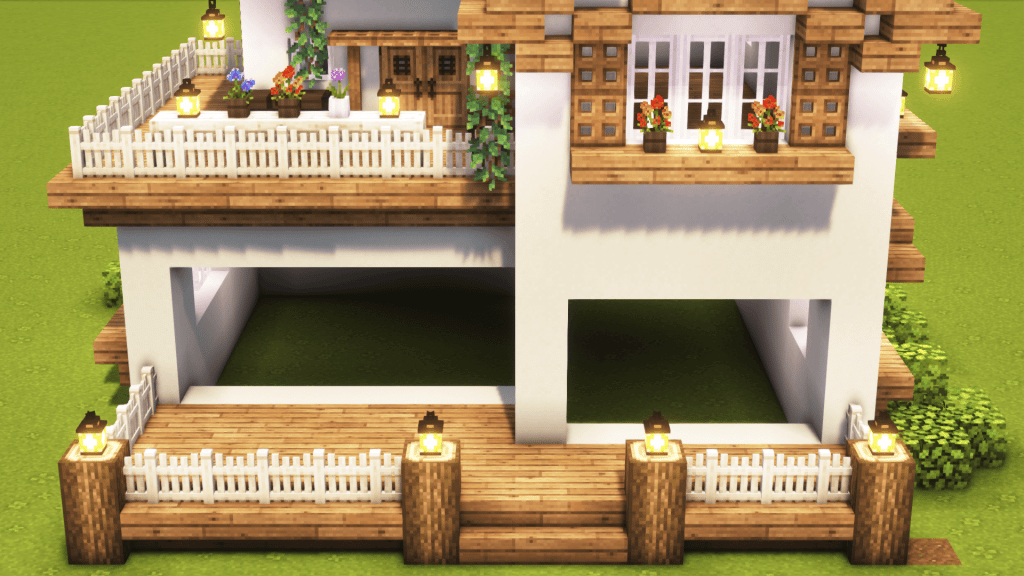
Step 3: Make the Entrance
Use oak logs and oak stairs to create a trim for the balcony on the first floor. Remember that 3 stairs in the middle are placed normally, while the rest is upside down.
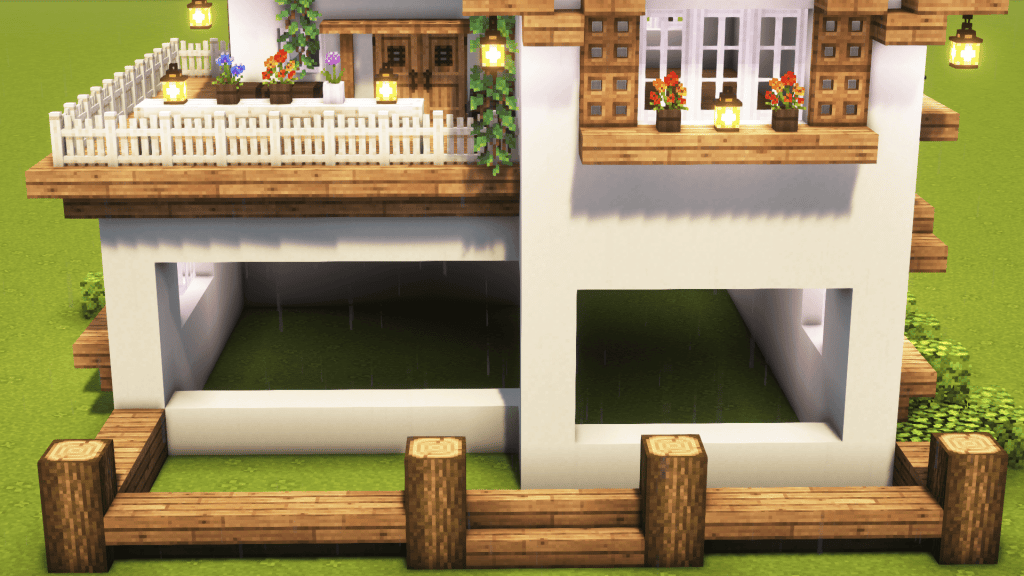
Fill the floor with oak planks, place lanterns on top of the oak logs, and finish it off with some birch fences around.
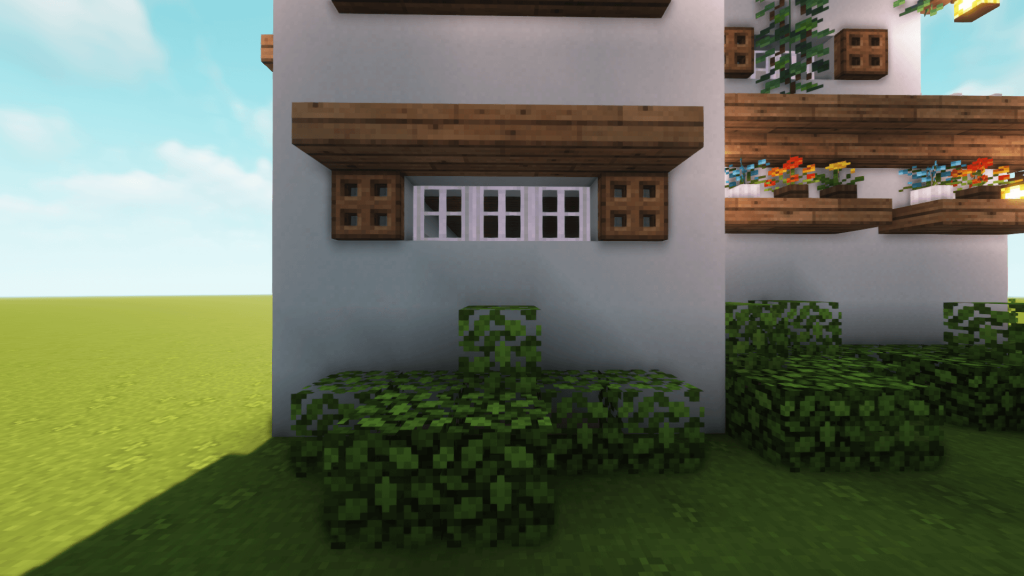
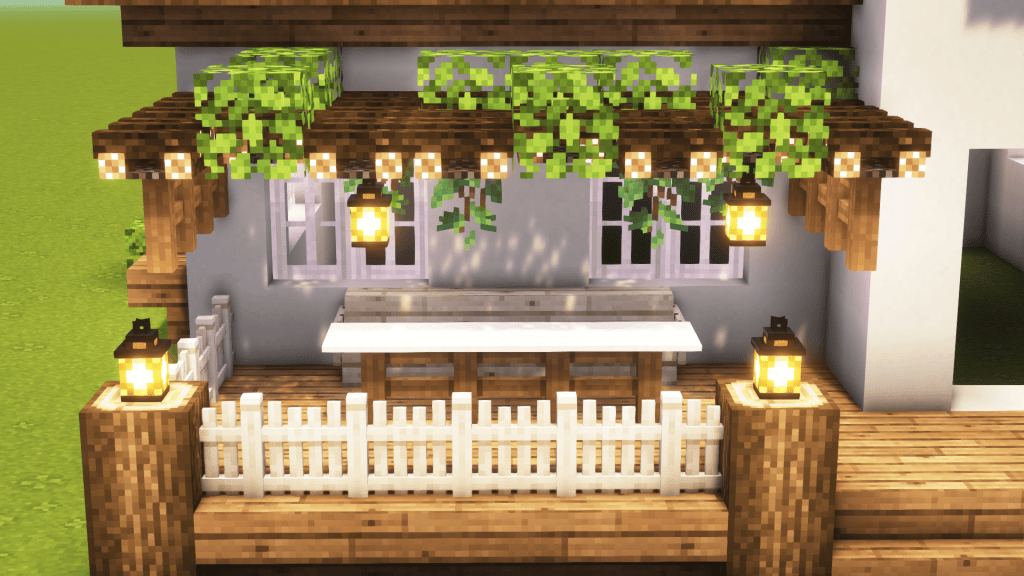
On the front side, left part, build two 2×2 windows like this.
Use the campfire and place them right on top of the windows, extending out by 4 blocks. Remember to leave some space to place the leaves in.
To finish this lovely balcony, let’s hang two lanterns and some glow berries on the ceiling. Then use 8 spruce fences on either side for support purposes. Now you can build the chair behind by using 4 birch stairs and 2 birch signs. Then the table can be built with 4 spruce fences and 4 white carpets.
Finally, the main door to your overgrown Minecraft house! Five blocks up, build a 3×1 window and cover it with 7 oak planks, then hang 2 lanterns on both sides. Put the remaining oak door in the center and use oak slabs and oak fences to create an entrance. Flower pots, dead bushes, and leaves are also placed on both sides as plants.

Conclusion
And that’s the end of the list about the overgrown Minecraft house! If you don’t know how to build, just remember that we have a detailed guide above! And if you want to merge the overgrown style with your cave base, check those awesome Minecraft underground base ideas!